low effort, high impact: how to put up a gallery wall
- Jul 28, 2023
- 4 min read
Updated: Nov 10, 2023
it all started with a blank wall and a bought of indecision. a blank wall holds endless possibilities and i wanted this wall to somehow embody all of who i am. that's a lot of pressure for a wall.
i have always loved a good gallery wall. i've had a gallery wall somewhere in my house for the last 10 years. but i thought since i was in a new space, living alone for the first time, maybe i should try something different. i had 5,000 ideas running through my head at once, per usual. here are a few that i was thinking of: a mirror (this or that), a fun wall paper (this, this, or this), a giant piece of art (this, this, OR this).
but after all that... i went back to my good ol' faithful gallery wall. there's just something so interesting about a gallery wall. so many places for your eyes to look. so many thing can be displayed! so many different styles can fit so beautifully together.
start:

finish:
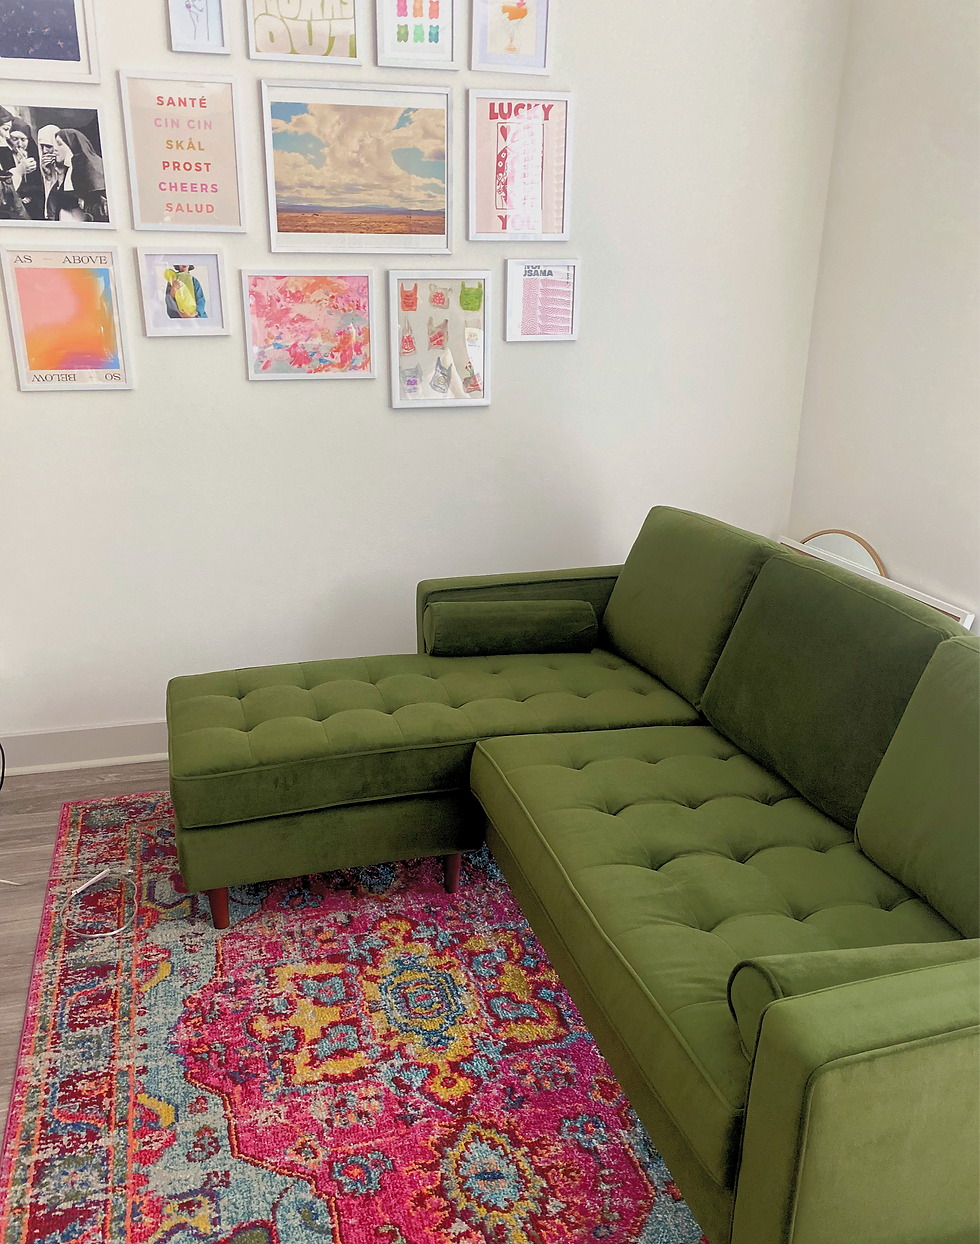
i love the way that the wall turned out and am excited to share some tips and tricks to help you create a gallery wall that represents your style and that you are equally as excited about.
first, find your style: modern, colorful, eclectic
i first decided what style i was going for. to get inspiration and ideas for art prints i love Society6. there are thousands and thousands and thousands of prints. be careful, it can become overwhelmingly mind numbing.
there are a lot of different ways you can create a gallery wall that has cohesion. you can do related colors (ex: pink, black and white, neutrals, blue), a style theme (i.e. pop art, flowers, vintage photos) there really are no rules but i've found that having something that relates pieces together is helpful. then you can throw in random pieces here and there.
next, find your art: scroll, scroll, scroll
this is both the most fun and most mind numbing part of the project. there are just so many options. and as we've noted: endless possibilities can be my downfall.
society6 makes this part of the process so enjoyable and so easy to narrow down what you are looking for. if you've come up with a theme you can filter art through colors, style, media. i like to have a few different forms of media (typography, photos, and art) but if you're just wanting to do photos or just typography-- society6 makes it easy!
here are the prints i chose (i've also created some pre-made bundles if you want to skip the scrolling or just want a foundation to tweak and build on!)

starting from top left:
next, decide the size
now to decide how you want to size the pieces. do you want a uniform style? all square 12 x 12 photos. all different sizes randomly through. a symmetrical layout with different styles? when i chose the sizes- i just thought about which art i enjoyed the most, which ones i thought would hold the most interest and create balance.
i also measured the wall. and thought through how much space i wanted to take up. the wall is pretty average sized so a bunch of 24x36 prints wouldn't make sense and neither would a bunch of 7x5 or 8x10 pictures.
find the frames
i got most of my frames from amazon or facebook marketplace and just painted them all so they would be the same color white. you can also go for a more eclectic look and get different ornate and interesting frames. i prefer to keep it simple. making them all uniform but there is a lot of room for creativity.
next, the layout
here's another space for some creative flexibility. you get to decide how you like it. no need to overthink it. a gallery wall isn't about perfection. there's room for things to be imperfect-- imperfect is interesting. but my one rule of thumb is to make sure that each picture lines up with another in some way- that the edge of one picture lines up with an edge of another, whether that's vertically or horizontally. this anchors each photo and gives it some sense of organization. you don't want any picture just floating aimlessly on the wall.
this
spaces between frames are even, easy for the eye to travel

not this
uneven. not sure where the eye should look.

I like to lay my pictures on the ground (as seen in first picture) as a way to visualize what they will look like on the wall.
hang 'er up
for this. in all honesty i usually wing it. i measure a lot- knowing how much space i want between each picture and adding that to the distance from the top of the frame to where the picture hangs. it's a lot of math and thinking. and inevitably i'll always have to move a nail or two.
but never fear!!! that's where the HANG-O-MATIC comes in.
I found this little tool after i hung my pictures but it would have been a bigggg time saver. it helps measure distance, level, and calculate where to nail. no more eye-ing it and just hoping it works or additional holes in the wall! win win all around.
i've used it for hanging a big picture above my bed and a mirror- but i'm almost tempted to find another place for a gallery wall in my tiny little space just to see what this bad boy is made of.
bada bing bada boom
and there we have it. your gallery wall is complete. my favorite part of the process is getting to create something entirely unique. with all the different pictures and colors and textures it never gets boring.
send me pictures of your gallery wall when you're done!

Comments